When your child gets on a horse for his/her first ride, you want everything to go smoothly and safely. It helps if you and the child have some basic understanding of the fundamentals of riding. If this is your child's first ride, explain a few things before putting the child on the horse.

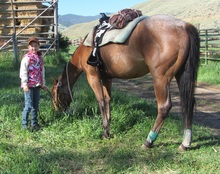
Horse waiting patiently for Dani
The first time a child rides a horse, it helps to have a gentle, well-trained horse that will stand patiently.
© 2015 by Heather Thomas
We'll assume the bridle and saddle fit the horse and that they were put on properly; maybe someone else saddled and bridled the horse (if this is a riding lesson at a stable) or you have assisted the child in proper saddling and bridling.
We'll also assume that the child is able to mount in a reasonable manner, without pulling the horse off balance or plopping down too hard in the saddle. It is customary to mount on the horse's left side, holding the reins in one hand and using the other hand to steady the stirrup while placing foot in the stirrup, and then using that hand to grab the saddle horn, saddle strings, cantle or the horse's mane. The child can use one of these handholds to pull himself/herself up into the saddle.
The first time, it helps to have a gentle, well-trained horse that will stand patiently. Otherwise it's wise to have a helper to hold the horse. If the child is short and the horse is tall, it's ok to use a mounting block, bale of hay or straw, or some other advantageous step-up to gain the needed height to safely and comfortably put a foot in the stirrup.
For a small child, you can create that step-up with your own hands. If the child is using a mounting block, hold the horse so it won't walk off before the child is mounted. The horse should stand quietly until asked to move forward.
Ready to ride!
Once safely on the horse, here are some pointers that can help ensure that your child's first ride will be a pleasant experience. These are some things that should be discussed ahead of time, and you can also gently remind the child as the lesson progresses, if you are the one giving the riding lesson:
1. Keeping a good balance
Try to keep good balance, sitting up straight. Don't slouch or sit too far back in the saddle because this puts your weight too far back on the horse and is not comfortable for him. His back is strongest up toward the withers, at the front. Lean slightly forward at gaits faster than a walk, so as not to hinder your horse's balance, and try not to wham down on the saddle too hard. If you can't keep a good seat at a trot, you may hurt the horse's back.
2. Basics of reining
If riding English using a snaffle bit, you will hold a rein in each hand. If riding western, the reins are held in the left hand. The reins should be even; there should not be one rein shorter than the other.
Keep a gentle light hand on the reins, moving with the horse's head and neck motion, so you never accidentally jerk on the horse's mouth with the bit. This is why it's important to have a good seat and balance, so you never have to catch your balance with the reins and inadvertently hurt the horse's mouth.

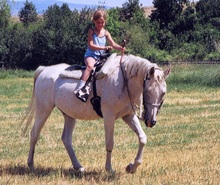
Dani guiding Veggie gently with reins
The rider should keep a gentle light hand on the reins moving with the horse's head and neck motion.
© 2015 by Heather Thomas
You'll be communicating with the horse via the bit, giving signals to control his speed or ask him to stop, and that communication is lost if you are jerking his mouth. One of the biggest mistakes made by beginners is that they often inadvertently pull on the horse's mouth with a tight rein, at the same time they are urging the horse to go forward. This sends mixed signals to the horse and he'll be confused, not knowing whether you are asking him to go or to stop. If he's very confused he may show resentment by bucking or rearing.
3. Using the reins to control the horse
Keep the reins short so you can control your horse, but not so short that you are always pulling on his mouth. To slow or stop him, give a gentle give and take pull and then release the pressure when he responds. His reward for doing the proper thing is the release of pressure on his mouth.
4. Signaling with the reins
To signal a turn, when riding English (with a hand on each rein), gently pull his head with one rein in the direction you want him to turn. If you want him to turn to the left you will move your left hand outward and 'lead' his head around to the left, giving as much with the right hand as you take with the left.
At the end of a ride, signal the horse to stop with a gentle give and take on the reins, and make sure he is stopped and standing quietly before you try to dismount.
When riding western, with a curb bit, you will be holding the reins in one hand, and neck reining. This means you'll move your hand forward and press one of the reins against the horse's neck to turn him. If you want him to go to the left, press the right rein against his neck to move his neck toward the left.
5. Signaling with your legs
To signal him to go forward, use your legs to encourage him to move. Press with the calves of your legs against the horse's side. Pressure with both legs tells him to move forward. Pressure from just one leg encourages him to move away from that pressure. Thus you can use leg pressure to help signal which direction you want him to turn, to augment your rein signal.
Make sure you are not inadvertently pulling on the reins when you ask him to move forward.
6. Stopping and dismounting
When you come to the end of your ride, signal the horse to stop with a gentle give and take on the reins, and make sure he is stopped and standing quietly before you try to dismount.

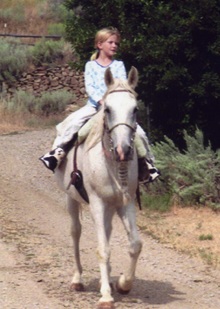
Samatha sitting tall and confident in the saddle
It is important for every youngster to learn confidence and control of the horse at the slower gaits before trying faster ones.
© 2015 by Heather Thomas
When dismounting, swing your right leg over the horse's rump, making sure you don't accidentally bump him or this might startle him into moving forward at the wrong time.
Also be sure to pause and take your left foot out of the stirrup as you dismount, so it won't accidentally be hung up in the stirrup as you come off the horse.
Practicing effective horsemanship
It is important for every youngster to learn confidence and control of the horse at the slower gaits before trying faster ones. Practice at the walk before trotting, and at a slow trot before a fast one.
Don't try to gallop until the slower gaits are mastered. Teach the child how to post the trot rising to one beat and sitting the next. This is the best way to stay in balance with the horse and not lose a good, secure seat.
It gets harder to communicate with and control the horse if the rider is not in balance and is bouncing along. especially if the rider has to grab the mane or saddle horn to keep from falling off.
When the rider is unbalanced and struggling to stay in the saddle, it creates problems for both the rider and the horse because the hands are not free and steady for proper rein signals.
If the horse is upset at being jerked in the mouth, or is uncomfortable from the unbalanced pounding on his back, he may respond with some unwanted behavior of his own.
Safety and confidence are gained with practice. If the child understands these basics, and practices them in an effort to improve his/her horsemanship and communication with the horse he/she will be off to a good start in ensuring a safe ride.
Did you know?
The rate of serious injuries per riding hours is higher for horseback riders than for motorcyclists and automobile racers. Riders under the age of 15 represent 20% of horse-related injuries. Helmets should be worn by all riders at all times. All helmets should conform to the American Society for Testing and Materials.
Second in the series
This is the second in a series of articles on Kids, Horses and Safety written by Heather Smith Thomas, author of Horse Tales, Training Horses, The Horse Conformation Handbook and many other books and articles. Look for the third article coming in August.
